Manage your workspace
Workspace organizes complete form documents. Use the Fields panel instead when you need to reorder or group fields inside the active form.
Create a form
Section titled “Create a form”- Open Workspace in the sidebar.
- Select Create Form.
- Enter a form name.
- Choose Blank Form or a starter template.
- Select Create Form.
A blank form requires a UI library. This choice determines its available fields and cannot be changed later. A template selects its configured library automatically.
To create a form inside a folder, open the folder’s Options menu and select Add Form.
Organize forms with folders
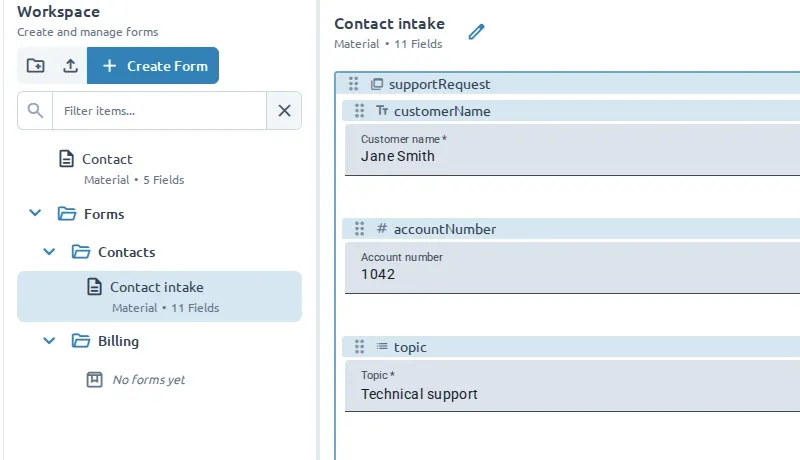
Section titled “Organize forms with folders”Select New folder to create a top-level folder. To nest one, open a folder’s Options menu and select Add Folder. Select a folder row to expand or collapse it.
Organize forms by project, team, purpose, or another structure that makes them easy to find. An expanded folder with no contents displays No forms yet.
Open and find forms
Section titled “Open and find forms”Select a form in the Workspace tree to make it active. Its row can show the UI library and field count.
Use the Workspace filter to search form and folder names. Matching folders and the path to matching forms remain visible. Clear the filter when no results appear unexpectedly.
Rename an item
Section titled “Rename an item”- Open the form or folder’s Options menu.
- Select Edit Name.
- Enter the new name and save it.
Renaming a form changes its document name in Workspace. It does not change any field label or key.
Delete an item
Section titled “Delete an item”Open the form or folder’s Options menu and select Delete.
Deleting a form removes only that document. Deleting a folder also removes every form and nested folder it contains, so review its contents before confirming.
Forms and folders are stored in the current browser. See Save, import, and export before clearing browser data or moving to another device.